Gravity Drip Irrigation for Under $20: A Field-Tested DIY Build
A gravity-fed drip system from a barrel and hardware-store fittings, for under $20 — parts, sizing math, a 35-minute build, and four first-build mistakes.
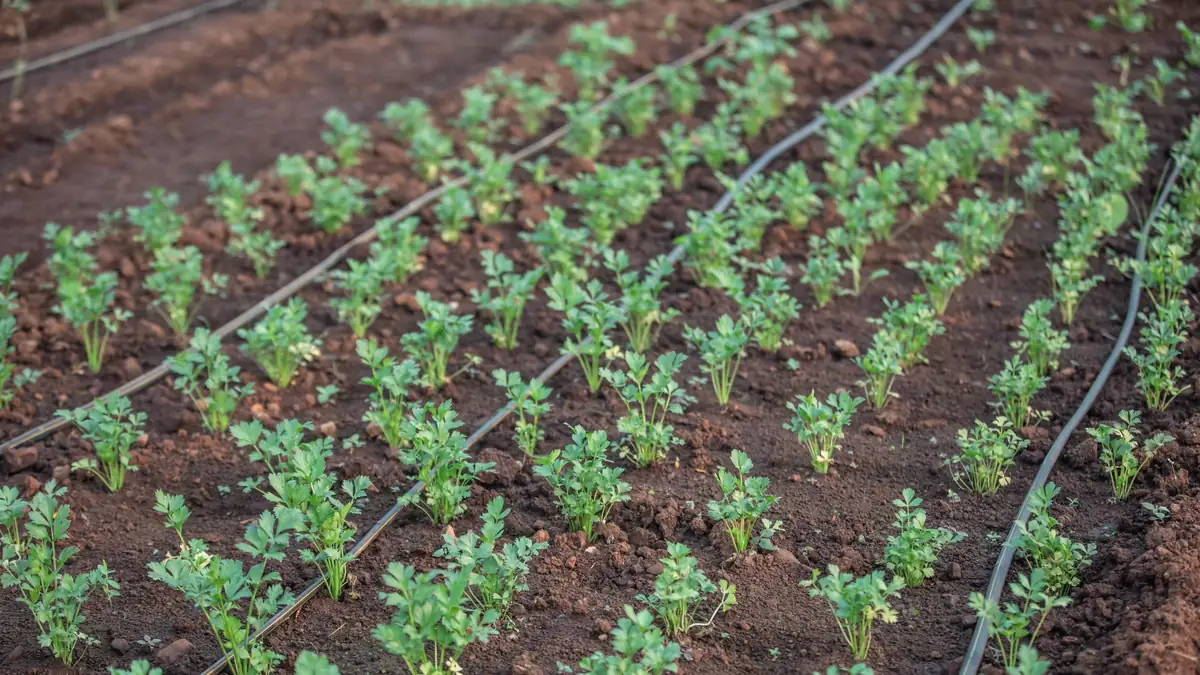
The cheapest, most reliable drip irrigation system in your garden costs $17 in parts, runs entirely off gravity (no pump, no electricity, no timer required), and waters a 4×8 foot raised bed for about two cents per fill. It’s also stupid to build wrong, so most first attempts spray, sputter, dry out, or blow apart.
This is a field-tested build for a single bed or balcony container array. Everything is sourced from a hardware store. Math is provided.
Why gravity drip beats every other DIY option
There are basically four options for the small-garden waterer:
- Hand watering — works, requires presence, wastes water through evaporation.
- Sprinkler on a timer — works, evaporation losses are 25–40%, wets foliage (disease risk), wastes on paths.
- Soaker hose — works at low pressure, clogs, uneven flow over distance.
- Drip irrigation, pumped — gold standard, costs $80+, requires power.
- Drip irrigation, gravity-fed — costs $17, no power, can fail-safe to manual.
For one bed, one row of containers, or one balcony grow rack, gravity drip is the win. Above about 200 square feet of beds you’ll want a pressure-regulated municipal feed.
The parts list ($17.13 at retail)
- 1 × 5-gallon food-grade bucket with lid — $5.00 (often $3 used; ask at a deli)
- 1 × ½-inch barbed bulkhead fitting — $2.50 (irrigation aisle)
- 1 × ½-inch ball valve, barbed — $3.00
- 20 ft × ¼-inch drip line, 0.5 gph emitters at 6-inch spacing — $4.50
- 1 × ½-inch → ¼-inch reducing tee adapter — $1.00
- 2 × ¼-inch end plugs — $0.50
- Teflon plumber’s tape — $0.50
- Total — $17.00, give or take.
The math: a 5-gallon bucket at 18 inches of head pressure delivers about 1.5 gallons per hour through 0.5-gph drip emitters across 20 ft of line. One full bucket waters a 4×8 raised bed for ~3 hours. At twice-weekly watering, one bucket = one bed-week.
The sizing math (do this before building)
Two questions decide whether gravity drip will work on your specific bed:
1. How much water does your bed need per week?
Rough rule: 1 inch of water per square foot per week. A 4×8 bed = 32 sq ft × 0.62 gallons (= 1 inch over 1 sq ft) = ~20 gallons/week, distributed across two or three waterings.
2. How much pressure (head) do you have?
Drip emitters spec a minimum operating pressure — usually around 8–15 PSI for “pressure-compensating” emitters and 4–10 PSI for cheap simple drippers. Gravity gives you 0.43 PSI per foot of height. A bucket at 4 feet above bed level = 1.7 PSI. Not enough for most pressure-compensating emitters; just enough for simple drippers.
Solution: use non-compensating, low-flow simple emitters (0.5 gph), set the bucket high (4–6 feet above bed), and accept that uneven flow over 20+ feet is real (last emitter at 0.4 gph, first emitter at 0.6 gph). For one bed, the unevenness doesn’t matter.
If you have less than 3 feet of head, this build won’t deliver enough pressure. Use a soaker hose instead.
The build (35 minutes)
-
Mount the bucket. Set it on a shelf, a stand, a milk crate stack — anywhere at least 4 feet above the bed soil line. Bucket needs to drain by gravity, so it must be uphill of every emitter.
-
Install the bulkhead. Drill a ½-inch hole 1 inch up from the bucket bottom (not at the absolute bottom — you want sediment to settle below the outlet). Insert bulkhead, snug the gasket. Teflon-tape the threads.
-
Attach the ball valve. Barb-fit the ball valve to the bulkhead outlet. The ball valve is your on/off. It’s also how you control “all on” vs. “trickle”; partial-close it to slow the flow.
-
Run the ½-inch backbone to the bed. Run ¼-inch drip line from the ball valve to the bed’s first row.
-
Loop the bed. Run the ¼-inch line in a U-shape down both sides of the bed. Use a stake every 18 inches to hold the line at soil level (don’t bury — clogs).
-
Cap the ends. Plug both ends with ¼-inch end plugs. (You can also leave one end as a flush valve — open it once a month, let sediment clear.)
-
Fill, open valve, observe. Time how long the bucket takes to drain. Adjust ball valve so a full bucket drains in 2.5–3 hours.
Test plan: the first 48 hours
Before you trust it:
- Hour 1: Watch for leaks at the bulkhead, valve, and tee. Tighten or re-tape.
- Hour 3: Bucket should be ~⅔ empty. If empty in under 1 hour, valve is too open. If still full, pressure too low (move bucket higher) or clog (flush the line via end cap).
- Day 2: Probe the soil at three emitters along the line. If front is wet but back is dry, the bucket is too low — raise it.
- Day 3: Watch the bed plants for the next 3 days. Wilt at midday is normal in hot sun. Wilt at sunrise means under-watering.
Four mistakes that ruin first builds
-
Bucket too low. Pressure equals height. If you have a 1-foot stand, you have 0.43 PSI, and your drip line emits a sad dribble at the closest emitter and nothing at the far emitter. Fix: elevate to 4–6 feet.
-
Buried drip line. Drippers clog with soil within weeks. Run on the surface, under mulch. Mulch over the line, not under.
-
No flush valve / end plug only. Sediment accumulates in the last foot of line. Once a month, swap an end plug for an open run, drain 5 seconds, replug.
-
Tap water with high mineral content. Mineralizes emitters within months. Use rainwater whenever possible — gravity drip pairs perfectly with a roof-catchment barrel above the bed.
Scaling up: from one bed to a working garden
The $17 single-bed build is a prototype. When you have 4 beds (one cubic yard of soil per bed, 128 square feet total), gravity won’t cover them all from a single 5-gallon bucket. You’ll want:
- A 55-gallon rain barrel, roof-fed, at 5 feet of head.
- A ½-inch backbone main line with ¼-inch laterals into each bed.
- A simple battery timer (Orbit hose-end timer, $20) if you don’t want to open the ball valve daily.
Total parts: ~$80 for a 4-bed gravity system, no electricity, runs from rain.
The Water Code gives you 40 monthly rain-capture logs, 20 cistern trackers and 20 irrigation logs (zone, volume, pressure, soil check), with reference pages on rainfall bands, irrigation systems and plant water needs.
Engineer the rain. Account for every drop. Even when the drops come from a $5 bucket above a $0.50 length of drip line.


The Winter Storm Kit Checklist (and the Three Things That Expired Since Last Year)
A winter kit built once is a kit that quietly goes stale. The checklist for a house kit, a car kit and a power-out box — and the three items that are almost always expired by now.
Read the article →
Seed Saving and the Inventory You Do in October
Saving seed is the easy half. Knowing what you have, and whether it will still come up, is what decides next spring's order.
Read the article →
Why Homestead Gifts Get Ordered in October
The good presents for people who keep land get bought early — useful things sell out and personal ones take time. A calm October list.
Read the article →